
Payment links in B-Online
Updated
You can create payment links with B-Online. It's a great way to share a unique payment link with your clients and request specific payment amounts.
Note - if you're looking to send payment links via your card terminal, please read the article about Pay by Link. |
Send this link via your preferred channel. Once your customer clicks on the link, a secure payment page will open and the customer will fill out the information. After a successful transaction, the customer will receive a confirmation email.
Creating a payment link in B-Online
Important: you can only create payment links in B-Online if you have this option activated. Reach out to our team to find out if this service is available to you. |
Log in to B-Online.
In the menu on the left-hand side, go to Pay by Link > Create.
This will open a new window. Fill out the required information.
Select the correct Merchant ID.
Select the correct Currency.
Under Merchant email address, input your registered email address.
You can add a Reference for your own records.
Under Expire date, specify which date this link will be valid until.
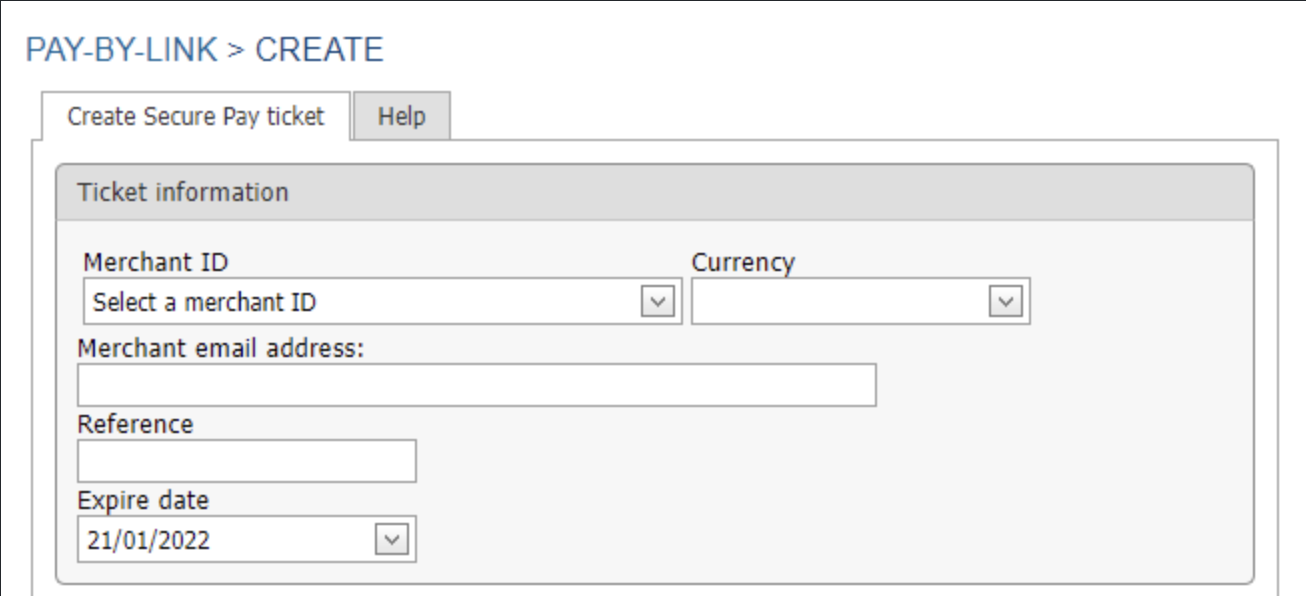
Important: the expire date cannot be amended. If you want to adjust it, you'll have to create a new link. |
Customising the payment link page
The payment page can be customised to reflect your brand and marketing needs.
You can:
Edit the language of the payment page.
Add a URL to a page the cardholder will be directed to once they've finalised the payment.
Add a URL to a page they'll be directed to in case they cancelled their payment.
Add your company logo to the payment page.

Adding items to the payment page
When you’re ready to create the payment ticket, follow these steps:
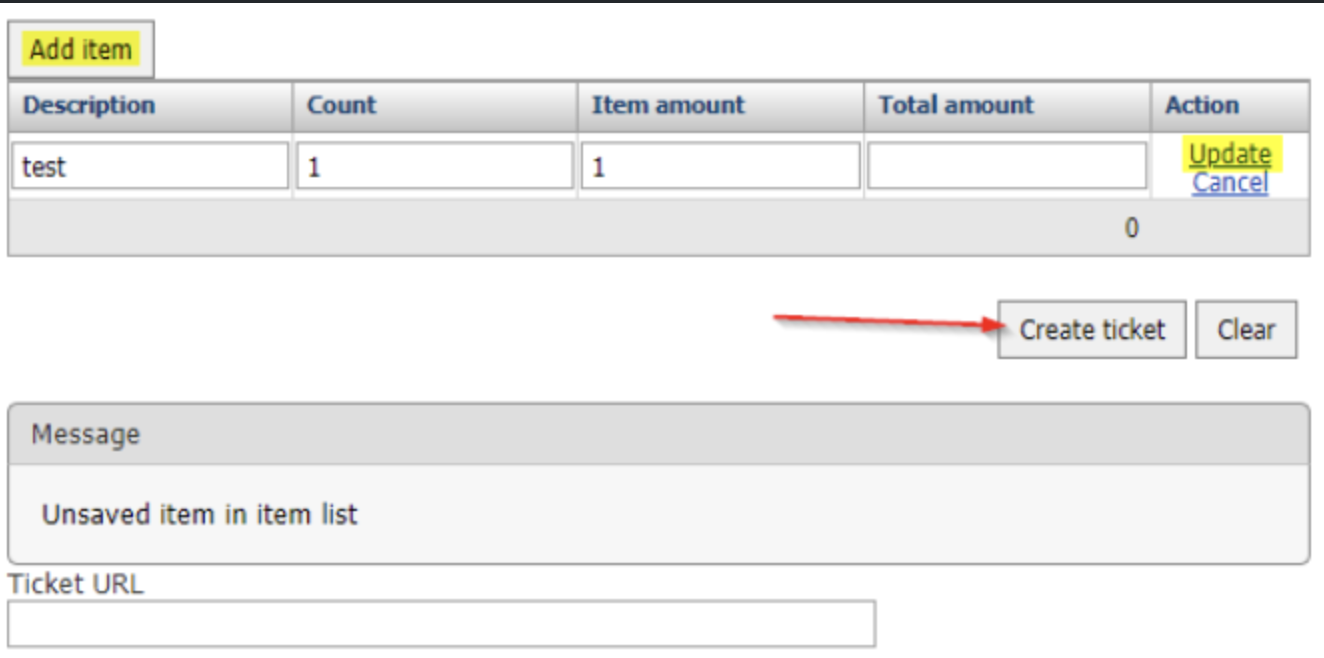
Select Add item.
Enter a brief product or service Description.
Input Count.
Input the Single item amount.
Press Update.
Important: you must press Update to include the item on the payment page. |
6. After all items have been entered, select Create ticket.
7. This will generate an individual URL for the payment link.
8. Copy and send the link to your customers using email, SMS, WhatsApp, or your chosen social media channel.
Useful tip: you can track and manage all your Pay by Link activity in the menu on the left-hand side under Payment links > Links. |
There you can:
See an overview of active and invalid links.
Track payments made using each individual link.
Delete links.