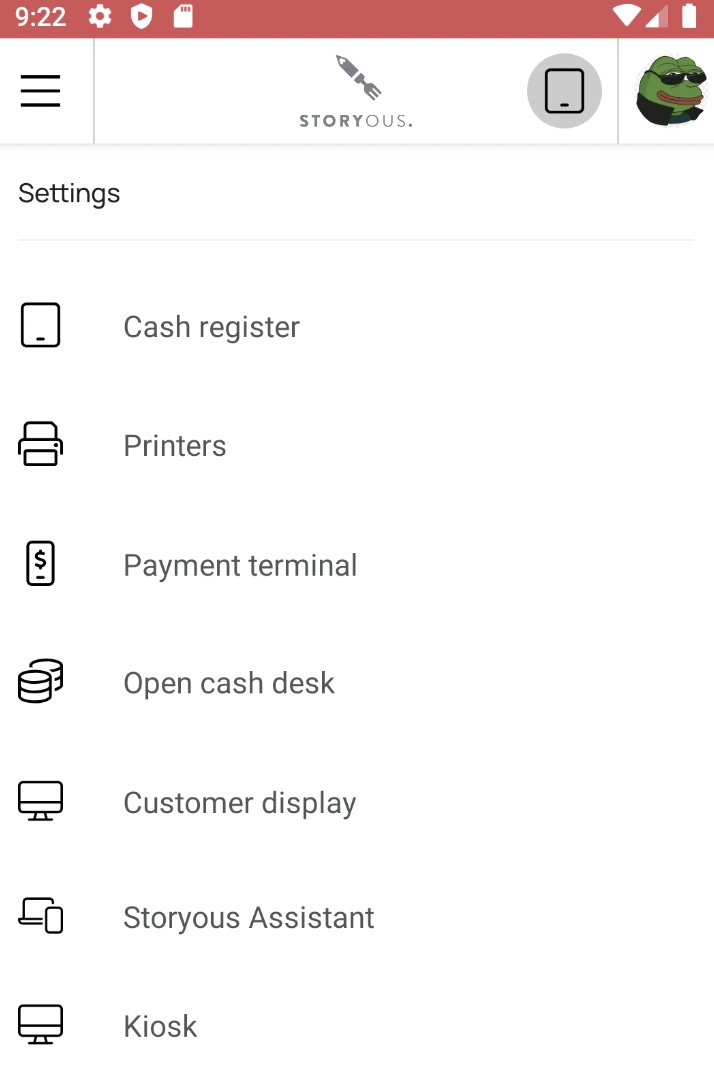
Cash register printer first steps

Updated 

You've just received your new printer. Let’s launch it together.

You have just received a new printer. Let's launch it together.

The printers ensure both the printing of receipts and the printing of vouchers (e.g. for the kitchen). We currently offer Xprinter printers (with the option of connecting to a router with a LAN cable or via Bluetooth/USB).

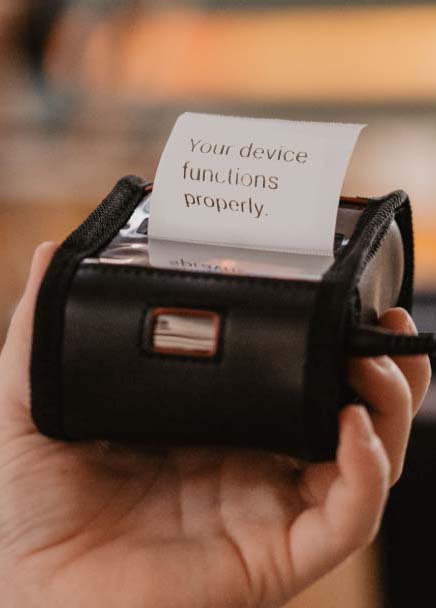
Printers work on the principle of thermal printing - thermosensitive paper is treated with a special layer, thanks to which the color changes due to heat. So there is no need to add toner to the printers. The discs for these printers are 80 mm wide (80/80/12).

Xprinter printers

  1. Xprinters do not have a battery and must be permanently powered by power cords. The charger has two parts that are part of the package.

  2. You turn the printer on/off using the button on the right side of the printer.

  3. To insert a roll of paper into the Xprinter, open the top cover. For all printers, the paper roll must unwind upwards.

  4. The round FEED button on the front of the printer allows the paper to advance.

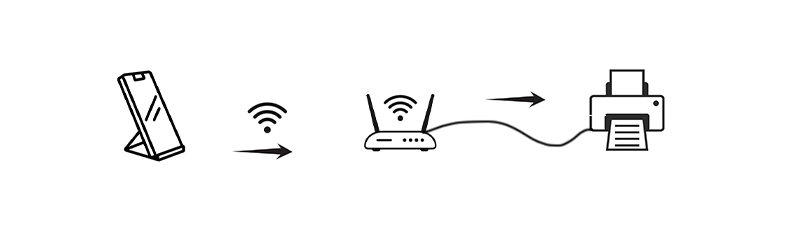
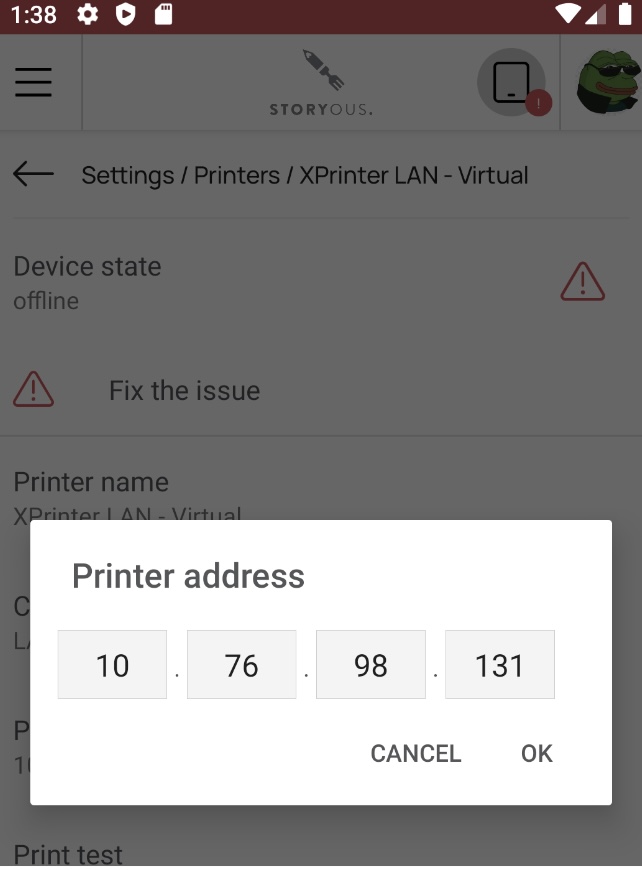
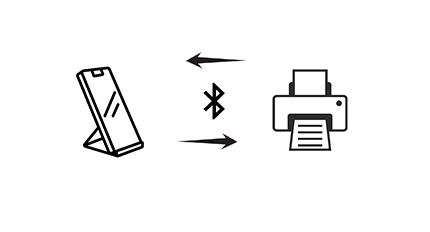
  5. Depending on the model of the purchased printer, the cash register/tablet and the layout of your business, the printer can be connected either via a LAN cable, Bluetooth or USB.

Note: If the printer only prints white paper, it means that the roll is not loaded correctly or you are not using the correct roll/paper type.

WE RECOMMEND ordering rolls from our company. We offer high-quality thermal paper made in Germany.

The LAN Xprinter needs to be connected via an internet (LAN) cable directly to the router. In order for the printer to communicate with the cash registers/tablets, your main cash register/tablet needs to be connected to the same network (either via Wifi or LAN).

WE HIGHLY RECOMMEND

  • Using a specific network only for the cash register system and its components.

  • Having all cash register system devices connected to the same network (does not apply to devices using mobile internet SIM).

  • Fixing the device's IP addresses for all your cash register devices, especially for the LAN printer so the IP address won't change and you avoid potential issues with printing.

  • Only choosing one connection method: LAN, Bluetooth or USB for your printer.

Step 1: LAN cable connection

1. Plug the printer in and turn it on by pressing the button on the right side.

2. Connect the LAN printer with your internet router.

3. The input for the LAN cable is labelled Net. You can find it on the back of the printer.

4. If the printer is connected to the internet via LAN cable, both the green and orange lights around the cable will light.

Step 2: Self-test printing

5. Turn the printer off by pressing the button on the right side.

6. Press and hold the Feed button turn the printer on at the same time .

7. Release the Feed button after three seconds.

8. This should print a long piece of paper.

9. Find your printer's IP address on this paper.

Note: a self-test is a printed paper with a summary of information about the printer. Without the information on the self-test, the printer cannot be connected.

Step 3: LAN printer connection

10. On the home screen of your main cash register/tablet you'll find the cash register app.

11. Open the cash register app.

12. Now click on your user and log in with your login details.

13. In the cash register app, click the Menu button in the upper left corner.

14. Choose the Settings section from the menu.

​15. Select the Printers option.

16. Click on the LAN Xprinter that you're connecting.

17. Select the Printer address option. This will open a new window.

​18. In this window, input the IP address that was printed on the self-test from your printer.

19. Click OK.

20. Log out from the app and log back in. The printer should be set up.

Important: it's only possible to set an IP address for the LAN printer if your user role is a merchant or place manager.

Checking the printer connection status:

If the printer is correctly connected and turn on, the device status should be Online. You can easily check this status with the Stability check option in the cash register app.

The test print:

1. In the cash register app, click Menu button in the upper left corner.

2. Select Settings from the menu.

3. Click on the Printers option.

25. Find the LAN Xprinter you're trying to connect.

26. The Device status should be Online.

27. Click on the Print test option.

28. The connected printer should print the message "Your device functions properly".

Bluetooth printers are paired with the cash register using Bluetooth technology. They also communicate via Bluetooth.

Important:

  • Place the printer no more than 3 metres from the tablet, preferably right next to it.

  • Do not place any objects or metallic material around the printer. This could affect the Bluetooth signal.

  • Only choose one connection method - LAN, Bluetooth or USB - for your printer.

The printer you purchased should already be paired with your cash register/tablet and ready to print. You can check the Bluetooth connection of your printer in the cash register/tablet Settings and the cash register app.

Checking the printer connection status

If the printer is correctly connected and turned on, the device status should display as Online. You can easily check status easily in the Stability check option in the cash register app.

The test print:

1. In the cash register app, click the Menu button in the upper left corner.

2. Choose the Settings section from the menu.

3. Select the Printers option.

25. Select the LAN Xprinter you're trying to connect.

26. The device status should display Online.

27. Select the Print test option.

28. The connected printer should print the message "Your device functions properly."

If the printer isn't paired, please follow these steps to pair it via Bluetooth.

Bluetooth pairing:

1. Turn the printer on.

2. On your cash register/tablet screen, click on Settings.

3. Choose the Connected devices option.

4. Click on Bluetooth, which should be turned on.

5. Under Available devices, select the printer.

Important: the printer name and the PIN for Bluetooth pairing depend on the model of your printer.

  • Xprinter 80 mm → Printer name: Printer001, PIN for pairing: 0000

6. Enter the Pairing code and confirm it.

7. In case of successful pairing, the printer will move to Paired devices.

After finishing pairing in the cash register/tablet settings you can check if the connection is successful and try to print the test print.

The PAX printer is a part of the PAX A920 device. This printer will be printing your bills with no need for pairing.

Note: if you wish to print order prints on this device as well, please contact our Customer Support and we'll set this option up for you.

Checking the printer connection status:

You can always check the device status, which should be Online. The status can easily be checked in the Stability check option inside in the cash register app.

The test print:

1. In the cash register app, click the Menu button in the upper left corner.

2. Choose the Settings section from the menu.

3. Click on the Printers option.

7. Select the Default printer.

8. The device status should display Online.

9. Click on the Print test option.

10. The connected printer should print the message "Your device functions properly."