We're creating resources and articles to answer your questions and help you get the most out of your Teya products and services.
Stock management in Admin
stock
stocks
stock-up
stock cards
stock card
stock card categories
stockup
automatic stockup
writes-off
stock list
semi-products
manufacture
Updated
4 months ago
, by Teya community
Stocks are an inventory management system in your business that helps you keep track of and plan your inventory effectively. It tracks the movement of goods from receipt to issue, preventing overstocking and shortages, minimizing losses associated with unused or lost goods.
Please note: This feature is not included in the base license, it is purchased separately.
How do Stocks work ?
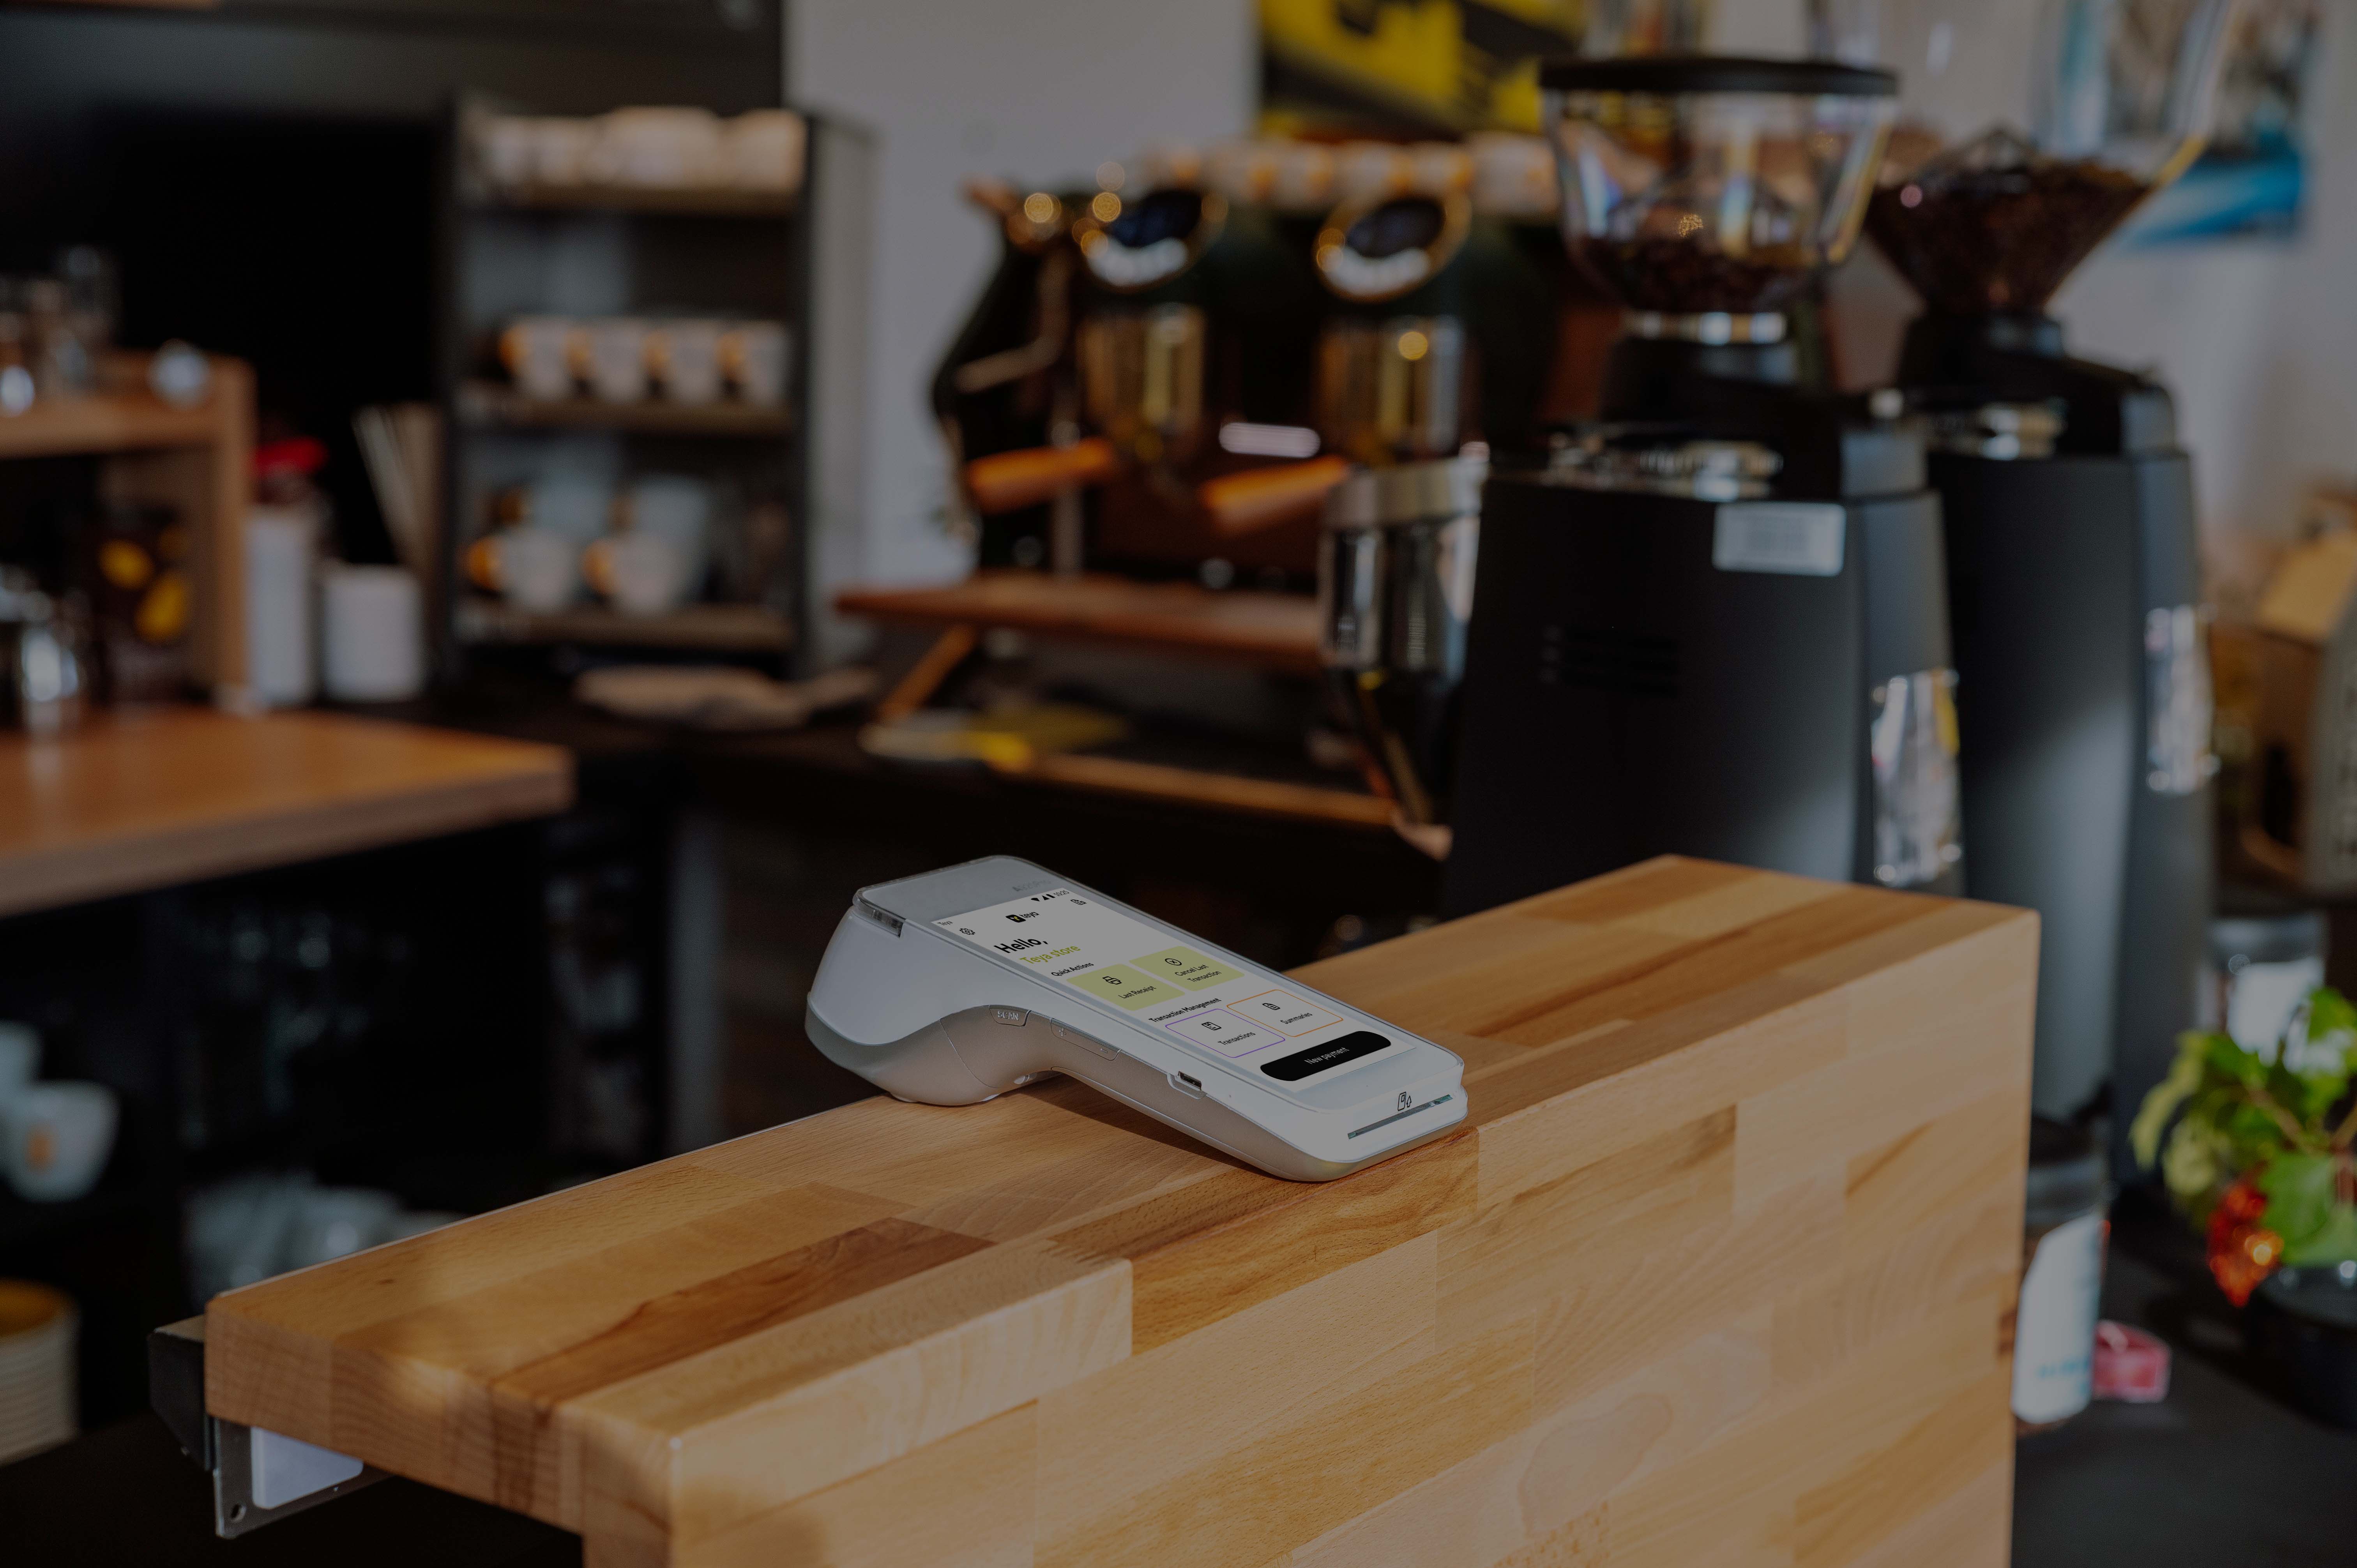
The Stocks function in Storyous connects the products you sell in your business (via the app on the device) with the items in stock (in your administration). The items will then be automatically deducted from your stock. This gives you full visibility of your stock levels.
What do Stocks look like in the administration?
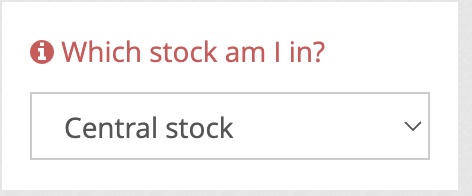
Stock selection:
In the upper left corner you can select the stock you want to work in and with the List of stocks button you can create a new stock or delete an unused one. In the drop-down menu in the stock selection, you can choose from the following stocks: all stocks, central stock, or a specific stock for your point of sale.
term
What you can find here
All Stocks
An overview of all your stock cards.
Central Stock
You have one per company, it serves as an archive of your stock cards and you can move your stock items from here.
Individual Stocks
They are created for your individual point of sale. Example: company XY owns a restaurant and a café. A restaurant stock will be created for the restaurant, a cafe stock will be created for the cafe.
We recommend: To have an individual stock for each of your points of sale.
Example of a point of sale: company XY owns a restaurant and a café. The restaurant is sales point A and the café is sales point B. In Storyous administration you can easily manage more than one of your outlets
Stock Card category
For easier orientation in your inventory, we recommend using stock card categories. They help to organize and group items according to common characteristics. This simplifies the orientation and management of stock.
In the upper right corner, click Stock Card Category, enter the name of the stock card, and click Add.
Note: The category will be visible for all of your places.
Note: Creating stock card categories is optional, but keep in mind that if you do not categorize your stock cards, they will be placed in the Uncategorized category.
Stock cards
To access Stock cards, go to Stocks in the top navigation bar, then select Stock cards in the menu on the left.
Make sure you've chosen the stock you're viewing in the top left corner (2).
Instructions:
1. Click on +New stock card in the top right corner.
Important – don't forget to select a specific Stock in the top left corner.
2. Fill in the Title of the stock card.
3. Fill in the Bar code (EAN) if necessary.
4. Choose the Stock card category if needed.
Note: use stock card categories to clearly list your stock cards and navigate through your stock management. Creating stock card categories is optional, but bear in mind that if you don’t place your stock cards in categories, they’ll be placed in the Unclassified category.
5. Select the VAT and Unit.
Important: after saving the stock card, you can't change the VAT and the unit.
6. Input the price with VAT and it will automatically calculate the price without, and vice versa, with the VAT rate you chose earlier.
Important - the price is for one unit (e.g., piece, milliliter, gram), depending on the unit you choose. If you don't specify a price for the stock card, it's okay; the price will appear for the stock card after stock-up where you specify the supplier price.
7. Select the Stock where you want this stock card to be created.
8. Press the Create button to confirm the stock card.
Note:look at the table below for more info on details required when creating a stock card.
Note: each Business ID has an archive for all your stock cards known as a central stock. This can’t be deselected.
Note: make sure you have enough goods before you start using your stock cards.
It’s important to connect the stock card/s with the specific product/s in the Storyous Admin. Items will only be deducted from stock/stock cards after Recipes have been created, and it can’t be done retrospectively.
Recipes example: a customer orders a can of Coca-Cola at the cash register. The can is connected to a Drinks stock card, which has 50 pcs of stock. When you sell the product at the cash register, the recipe automatically deducts one item from the Drinks stock card.
Term
Description
Title of card
This field is for naming stock cards and your records.
EAN
This optional field is for the bar code of the stock card.
Category
Select which category you want to place your stock card. Stock card categories are used for clearly listing your stock cards and they help you to easily navigate your stock management.
Default VAT
The stock card tax rate is set by law. If required, choose the VAT. Bear in mind that you can't change the VAT after saving the stock card.
Unit
Enter the unit in which your goods are stocked. Bear in mind that after saving a stock card, you can only change the unit if there’s been no movement on the card.
Price without VAT
Enter the purchase price without VAT. This will automatically calculate the price with VAT.
Price with VAT
Enter the purchase price with the VAT. This will automatically calculate the price without VAT.
Allow recalculation
This optional function works with the conversion of units of measure. It can be used when selling split beverages. For example, you buy bottles of wine in pcs but sell them in glasses.
Connect with the menu item
Check this box for the option to create a product for this stock card. Once you’ve saved the stock card, it will create a product linked by a Recipe to the stock card you’ve just created. This is only possible if the stock card unit is in pieces. It’s recommended that you only check this box if you don’t have a product created to link to the stock card.
List of aliases
Stock cards can be linked by alias. This feature can be used if you’re buying, for example, peppers and don't mind which colour they are. For all types of peppers, you have a stock card where you keep track of the stock.
Optimal amount
It’s possible to set the optimal amount for any stock card, which can be very useful when stocking. For instance, you notice that you’re five pcs short of your optimal amount of 20, so you ring your supplier and order five pcs to make the amount optimal again.
Critical amount
It’s possible to set the critical quantity for any stock card. When the stock card's level drops to/below that quantity, this will display an exclamation mark and the stock card will be highlighted in red.
1. Select the Stock cards subsection.
Important – don't forget to select a specific Stock in the top left corner.
2. Find the Stock card you want to edit.
3. In the Action column on the right side, select the pen icon.
4. This will open a new window. Here you can edit the stock card details.
5. Click the Edit button after you've made the changes.
Important: after creating a stock card, it’s not possible to edit/change the VAT. Similarly, you can’t change/edit the stock card unit after stocking up, connecting to the product item in the Storyous Admin, and selling the product. If you need to edit VAT or a unit, you have to delete and archive the stock card you want to change, and then create a new one.
Note: it's possible to change the price of the stock card, but bear in mind the product that you're selling. It's recommended that you check the product price as well.
If you decide that you no longer need an item in a particular stock, you can archive/delete the stock card.
1. Select the Stock cards subsection.
Important – don't forget to select a specific Stock in the top left corner.
2. Find the Stock card you want to delete.
3. In the Action column on the right side, select the red icon.
4. Click the OK button to confirm deletion.
Important: make sure that you have zero goods left on the stock card before deletion.
Important: this action will move the deleted stock card to the central stock, as this serves as an archive for all your stock cards. It’s not possible to delete stock cards from the central stock, but you can hide them by archiving them.
To hide/archive the stock card from the central stock after deleting it:
1. Select the Central stock in the top left corner.
2. The central stock will open.
3. Find the Stock card you want to archive/make inactive.
4. In the Action column on the right side, select the Lock icon.
5. This will move the stock card to Inactive stock cards.
Note: you can always view your inactive stock cards and relocate them to active in the central stock. Simply click on the Lock icon and the card will move back to active stock cards.
Term
Description
Active stock card
The active stock card will show in your central stock. The central stock serves as an archive and gives you visibility of all your stock cards. When a stock card is deleted, it can still be found in the central stock as active.
Inactive/archived stock card
With this feature, you can hide/archive stock cards that you don’t want to use or that you’ve created by mistake.
Instructions:
1. Select the Stock cards subsection.
Important – don't forget to select a specific Stock in the top left corner.
2. Find the Stock card that you want to view.
3. Click on the Info icon in the Action column on the right side.
4.This will open a new window. Choose the date range and click the Submit button.
5. View the stock card history and information.
Recipes - stock card and product connection
Recipes serve as the link between a specific product and its corresponding stock card(s). When a customer orders a product using the cash register, the system automatically deducts the required quantity of that product from the available stock. However, it's important to note that you can only create a recipe for a product after both the product itself and its corresponding stock card have been established in the system.
Below read more on how to set this connection up.
Note – Locationexample - company XY owns a restaurant and a coffee shop. The restaurant is location A and the coffee shop is location B. You can manage multiple locations with Storyous by Teya.
After choosing the Setup in the top bar and selecting your business place, do the following:
1. Click on the Products subsection.
2. Select the desired product Categories from the dropdown menu, e.g. pizza.
3. Find the product you want to connect with the stock card in the list below.
4. In the Recipes column on the right side, click on New recipe.
5. This will open a new window where you will be creating the recipe.
6. Write down the Stock card titles/names, e.g. tomato.
Note: you can only insert stock cards that already exist in your system.
7. Enter as many stock cards you want to connect with your product for this recipe.
Important: if you don't click to select the stock card from the menu, the product won't connect to the stock card.
8. Input the Quantity, Unit and Countdown stock to all stock cards contained in the product.
9. Confirm the recipe by clicking on the Create button at the bottom of the page.
Thanks to this connection between the product and the stock card/s, every time you sell a product at the cash register/tablet app, the items/stock cards you put in the recipe will be automatically deducted from the stock.
Example 1:
Restaurant
Product = margherita pizza
The stock cards related to this product are = one tomato, two pieces of mozzarella, three cloves of garlic, etc.
You define what quantity of each stock card should be deducted when selling one pizza, thanks to the recipe you defined. So one piece of margherita pizza will require x amount of tomatoes, for example.
Example 2:
Flower shop
Product = Bouquet of tulips for Valentine’s day.
Stock card = tulips
The flower shop has 5000 pcs on the tulips stock card. Due to the recipe between the product and the stock card, every time big tulips are sold, 1000 pcs will be deducted from the stock.
Instructions:
1. Click on the Products subsection.
2. Select the desired product Categories from the dropdown menu, e.g. pizza.
2. Find the product and the recipe you want to edit.
3. In the Recipes column on the right side, click on Edit recipe.
4. This will open a new window. Here you can edit stock card/s connected to this product.
Important: to delete some stock cards from the recipe, simply click on the cross icon on the right side of the attached stock card. If you delete all connected stock cards the connection/recipe will be deleted for this product.
Don't forget to confirm the action by clicking on Edit button at the bottom of the page.
If you buy bottles of wine from your supplier, you can easily store them in your warehouse with the storage function. In the case of selling wine for glasses, it is necessary to set the conversion of units from pieces to litres in the stock card. If you know that one bottle of wine has 0.75 l, state this number in the conversion of units and then state the number 0.2 l in the recipe, ie the volume of one glass. Even if we stocked pieces of wine bottles, the glasses will be deducted in litres.
Stock list
The Stock list enables you to manage all the stocks in your company, and to set the subtraction of items from the stock by zones. Depending on the type of subscription you have for stock management, you will be able to have central stock and an additional stock, or an unlimited number of stocks.
Under one Business ID you will always have one central stock. It serves as an archive of all stock cards.
Note: it’s not possible to delete stock cards from the central stock, but you can hide them by archiving them.
From the central stock, you can transfer stock cards to other stocks in your administration. The stocks' items can vary.
1. Select Stocks form the top bar navigation on the home page.
2. Select Stock list from the menu on the left.
3. Select +New stock in the top right corner.
Note: the stock needs to be named and assigned to a specific company.
4. Choose the Business you're creating the stock for.
5. Enter the desired Stock title.
6. Click on Create.
7. The stock will appear in the Stock list.
Editing the active stock:
1. Click on the Stock name and make the necessary changes.
2. To save your edits, click on the confirmation icon.
Archiving the active store:
1. Choose the stock you want to archive.
2. Click on the bin icon.
3. Confirm archiving by clicking the OK button.
Changing the active stock's zone:
1. Select the stock for which you want to change the closure zone.
2. Check or uncheck the zone checkboxes in the respective columns.
Note - zones are set up in our internal system. If you want to change the zones in your business, please contact our customer support.
Example of zones - zones in our internal system can represent places or service areas in your locations Zone 1, for instance, could be the outdoor seating area, and Zone 2 could be the restaurant. You have a POS at both of these locations. Zones are created if you want to perform closures separately at different locations or devices. If you have one zone where all the POS are, you'll only be able to perform a closure on the main POS.
After deactivation, the stock moves to Inactive stocks.
To reactivate stocks, simply click on the reload icon on the right side.
If you'd like to customise which zone the goods will be deducted from depending on the device being used, you can do so by using the checkboxes under Zone.
1. Select Stocks.
2. Select Stock list.
3. Check or uncheck boxes under Zone to change the zone subtraction setting.
Note - zones are set up in our internal system. To change the layout of your zones, contact our customer support.
Example of zones - zones in our internal system can represent places or service areas in your locations Zone 1, for instance, could be the outdoor seating area, and Zone 2 could be the restaurant. You have a POS at both of these locations. Zones are created if you want to perform closures separately at different locations or devices. If you have one zone where all the POS are, you'll only be able to perform a closure on the main POS.
Stock-ups
Stocking is performed for each warehouse separately. If you want to add a quantity to your stock cards, you need to make a stocking.
To manage stock-ups and display stock-ups history choose the Stock (1) section on the top bar of the page. You'll see the menu with Stock-ups(3) on the left side.
Important – don't forget to select a specific Stock (2) before you start managing stock-ups.
Note – for example, XY company owns a burger bar and a coffee shop. Location A is a burger bar and location B is a coffee shop. For each location you created a specific stock and it's important for you to distinguish between stocking and inventory for individual locations.
1. Select the Stock-ups subsection.
2. Click the + New stock-up button, on the right top corner.
3. Select the stock for the stock-up.
4. Select the Date - Now or In the past.
Note - stock-up for past periods can only be carried out up to a maximum of 45 days back.
5. You can enter the Document number for your record.
6. Fill in the Supplier's name.
Note - uploading an e-delivery note is only possible in the case of automatic stocking and supported suppliers. Read more about automatic stock-ups in this article.
7. Click on the + icon in the the fiel bellow.
8. Type the Name of an existing stock card and select it from the list or just create a New stock card.
9. Enter the Amount in the unit of your choice.
10. If needed, you can also adjust the Price during the stocking process.
Note - in case the item had been stocked at a specific price in the past, and you're now stocking it at a different price, the system will calculate the weighted average from the new price.
11. Confirm the stock-up by clicking the Create button.
1. Select the Stock-ups subsection.
Important – don't forget to select a specific Stock before you start managing stock-ups.
2. To delete a specific stock-up click the bin icon. If you wish to edit a specific stock-up click the pencil icon.
Important - stock-up can be edit or delete maximum of 45 days back.
Automatic stock-up
Automatic stocking operates by uploading an electronic delivery note into the system, provided by your supplier instead of the traditional paper invoice. With automatic stocking, all items are seamlessly recorded without the need for manual entry of individual stock cards, including raw material quantities.
To manage automatic stock-ups and display stock-ups history choose the Stock section on the top bar of the page. You'll see the menu with Stock-ups on the left side.
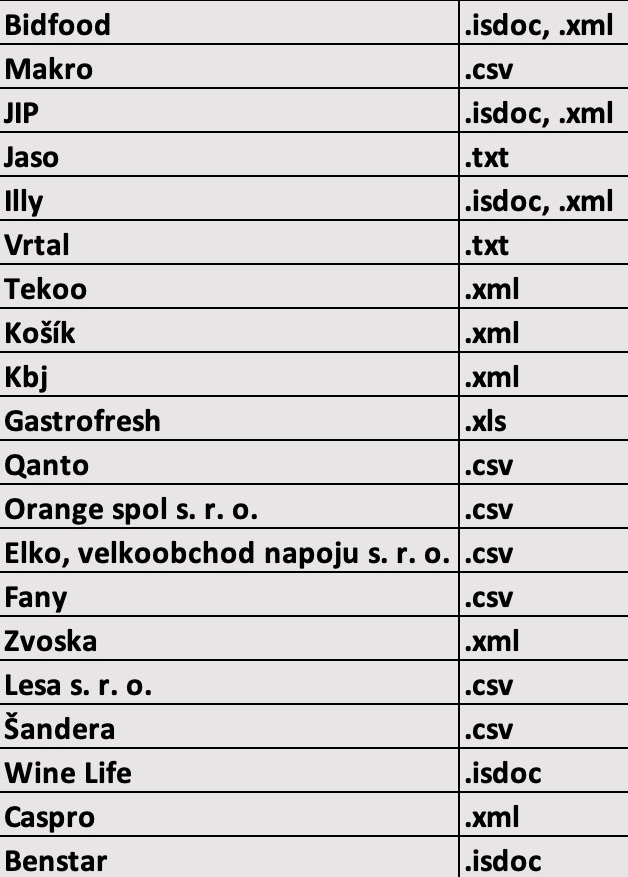
Currently, automatic stocking is available in collaboration with the following suppliers:
For these suppliers, the following formats are supported for uploading electronic delivery notes:
If you wish to implement automatic stocking in your business, please contact your sales representative at the supplier before making purchases. Request that they send you electronic delivery notes.
Note –if you're not receiving electronic delivery notes in the desired format, please contact your supplier for their delivery
1. Select the Stock-ups subsection.
2. Click the + New stock-up button, on the right top corner.
3. Select the stock for the stock-up.
4. In the field fo the Supplier type the supplier's name.
5. Select the supplier from the list.
6. Click the Upload e-delivery note button.
7. Upload your e-delivery note.
8. All items from your purchase will then be automatically filled in according to the delivery note.
9. Select the Date - Now or In the past.
Note - stock-up for past periods can only be carried out up to a maximum of 45 days back.
10. Check uploded data and confirm the stock-up by clicking the Create button.
Important - it's ideal to have stock cards prepared in advance and ensure existing stock cards are correctly named, have the right unit, and VAT rate in the system. This allows you to avoid creating cards during stocking and instead link the delivery items to existing stock cards.
Important - if you're stocking new items not yet in the system or if the stock card names differ slightly, the system will prompt you before saving. You can then choose to either Attached to an existing stock card or Create a completely new stock card by entering all the details directly in the window."
Important - if you choose the option to Attached with an existing stock card, but that card has a different unit than the item on the electronic delivery note, the system will prompt you to enter the conversion rate between the two units.
Example - we're stocking 15 packages of Bohemia chips, each weighing 70 g. In the conversion, we'll specify that all 15 packages weigh 15×70= 1050 g.
1. Select the Stock-ups subsection.
Important – don't forget to select a specific Stock before you start managing stock-ups.
2. To delete a specific stock-up click the bin icon. If you wish to edit a specific stock-up click the pencil icon.
Important - stock-up can be edit or delete maximum of 45 days back.
Stock transfer
The Stock transfer section allows you to move items from one stock to another.
To manage stock transfers choose the Stock section on the top bar of the page. You'll see the menu with Stock transfer on the left side.
1. Filter the time range in the upper right corner.
2. Define the criteria of the stock transfer, such as from which stock to which stock, the author, or leave a note.
3. Export the list to a .csv file by clicking on Export .csv in the upper right corner.
1. Select Stock transfer from the menu on the left.
2. Select +New stock transfer in the upper right corner.
4. In the nex window, choose from which stock you're transferring.
5. Then, choose to which stock you're transferring.
6. A new window will open and you can define more details of your New stock transfer, such as:
date (current or past).
enter a note.
select stock cards.
the amount of stock cards you want to move.
Note – the stock cards you select will change in both stocks - the amount will decrease in the stock you're transferring from, and increase in the stock you're transferring to.
Note – if you change the price, the stock card will then be placed in the stock you're moving it to in its newly specified price.
7. When you've defined everything you wanted to, click on Create to complete the transfer.
Write-offs
If you encounter goods that went bad in your stocks, you can easily write them off in the section of the Stock management called Write-offs.
Important –don't forget to select the specific stock from the top left list.
You can also export them to CSV by clicking on Export .csv button on the right, or sort and filter according to the specifications. By clicking on the information icon in the Action column, you can see more details regarding the chosen write-off.
Instructions:
1. Select +New write-off and a new window will open.
2. Choose whether you'd like to enter a write-off happening now, or one that happened in the past.
3. Under Note provide a brief explanation of the reason for this particular write-off.
4. Enter the title of all stock cards that require a write-off.
5. Enter the correct amount.
6. Click the Create button to confirm the write-off.
If you frequently prepare banquets or breakfast buffets from the same ingredients and you record the usage by using write-offs, you can now simply re-create them. Easily copy and paste write-offs, there's no need to enter each stock card separately.
For a write-off you'd like to repeat:
1. Click on the repeated write-off icon.
2. Then click on the Create button to repeat the write-off.
Stock inventory
To manage your stock effectively, you can conduct an inventory in Storyous Admin. The inventory provides you with an overview of your stock items. Through inventory, you have the ability to completely update the stockings (stock cards) to match the value you specify.
To manage stock inventory choose the Stock (1) section on the top bar of the page. You'll see the menu with Inventory (3) on the left side.
Important – don't forget to select a specific Stock (2) before you start doing your inventory.
Note – for example, XY company owns a burger bar and a coffee shop. Location A is a burger bar and location B is a coffee shop. For each location you created a specific stock and it's important for you to distinguish between stocking and inventory for individual locations.
1. Select the Inventorysubsection.
2. Click the + New stock-up button, on the right top corner.
3. Select the stock for the stock-up.
4. Select the Date - Now or In the past.
Note- an inventory for past periods can only be carried out up to a maximum of 45 days back.
5. You can also add the Note, if necessary.
6. Bellow you'll find the list of all your stock card categories and stock cards.
7. By clicking the Show all categories or Hide all categories button, you can choose the approach that best suits you for conducting an inventory..
8. In the column Amount, fill in the actual state of stock cards.
Note - if you don't fill in the quantity for some of the items, the item won't be displayed in the inventory detail.
9. Click the Save button.
Note - you can record inventory in secondary units as well (for example, if the inventory card is set up in litres, you can record the inventory level in mililiters). The final inventory result will continue to be stored in the original unit, which, in our case, is litres.
The stock inventory history can be found in the Inventorysubsection. All your previously conducted inventories will be listed here. You can use the calendar to display only inventories that took place within a specific time frame, and sort inventories by Notes or the Author.
Important – don't forget to select a specific Stock.
You can export the list of all inventories to a .csv file. The number displayed for a specific inventory is the balance, which represents the total amount by which your stock differentiates after the inventory.
1. Select the Inventorysubsection.
Important – don't forget to select a specific Stock.
2. To edit a specific inventory click the pencil icon.
Important - the inventory can be edit maximum of 45 days back.
1. Select the Inventory subsection.
2. Click the + New stock-up button, on the right top corner.
3. Select the stock for the stock-up.
4. Click the Print Inventory button, on the right top corner.
Note - this option allows your employees to easily fill in the stock levels in the printed table. You can choose whether the list of inventory cards will be displayed in one or two columns
It's not possible to delete the stock inventory. If your inventory wasn't completed accurately, you have a 45-day window to make retroactive adjustments. For inventories conducted more than 45 days ago, the only option is to create a new inventory
Semi-products
Semi-products serve as an optional feature when creating conections between products and stock cards by recipes. This feature potentially saving you a significant amount of time and effort while conecting your products with stock cards.
Example – the semi-product can be fresh mayonnaise, and the items (stock cards) for this mayonnaise will be Large eggs, Dijon mustard, Fresh lemon juice, Salt, Freshly ground black pepper, and Vegetable oil. In this way, you actually prepare a semi-product named fresh mayonnaise that you often use in many of your dishes so it helps you in easier link your products with stock.
To manage choose the Stock (1) section on the top bar of the page. You'll see the menu with Semi-products (3) on the left side.
Important – don't forget to select a specific Stock (2) before you start doing your semi-products.
Note – for example, XY company owns a burger bar and a coffee shop. Location A is a burger bar and location B is a coffee shop. For each location you created a specific stock and it's important for you to distinguish between stocking and inventory for individual locations.
Note – you can connect your product items with created semi-products as well as with normal stock cards.
1. Select the Semi-productssubsection.
Important – don't forget to select a specific Stock.
2. Fill the Title for this semi-product.
3. Select the Unit for this semi-product.
4. Click the Create button.
Important - to create a semi-product recipe, you must already have all the stock cards for this semi-product created. So, firstly, ensure that you have all the required stock cards created in your stock.
5. Find the semi-product in the list.
6. In the Action column, click the Recipe button.
7. Choose the stock cards that will be deducted from your stock when entering a semi-product.
8. Start typing a few characters from the name of the stock card in the field, the system will offer you a list of matching cards.
9. Click on the required stock card for this semi-product.
10. Specify the Amnout of this stock card that is used for your semi-product.
Note - you can use either the basic unit in which the card was created, such as "kg," or opt for a smaller unit like "g" when entering stock cards into the semi-product recipe.
11. Click the Create button.
1. Select the Semi-products subsection.
Important – don't forget to select a specific Stock.
2. Find the semi-product and the recipe you want to edit.
3. In the Action column on the right side, click the Recipe button.
4. This will open a new window. Here you can edit stock card/s connected to this semi-product.
5. After making the changes, click the Create button.
If you decide that you no longer need a semi-product in a particular stock, you can archive/delete this semi-product. It isn't possible to delete the semi-product. All archived semi-product will be listed in the Inactive tab.
1. Select the Semi-products subsection.
Important – don't forget to select a specific Stock.
2. Find the semi-product you want to archive.
3. In the Action column on the right side, click the red icon.
4. This semi-product move to the Inactive tab.
Note - you can restore archived product at any times by clicking on the lock icon in the Inactive tab in Semi-products subsection. After restoring this semi-product, it'll be moved back to the Active tab.
When you manufacture a semi-product, you essentially create a stock card. All linked stock cards in the semi-product recipe are deducted from stock once is manufactured.
Example - the semi-product can be fresh mayonnaise, and the items (stock cards) for this mayonnaise will be Large eggs, Dijon mustard, Fresh lemon juice, Salt, Freshly ground black pepper, and Vegetable oil. Once you manufacture this fresh mayonnaise all ingredients in the recipe are deducted from the stock and your fresh mayonnaise will be manufactured and become a stock card. All manufactured semi-product you can find in the Manufacture subsection.
1. Select the Semi-products subsection.
Important – don't forget to select a specific Stock.
2. Find the semi-product you want to manufacture.
3. In the Action column on the right side, click the Manufacture button.
4. This will open a new window. Here in the Count field simply enter the quantity you are producing.
5. Select a specific Stock where you want this manufacture semi-product to be recorded.
6. Select the Stock card category.
7. Define the VAT rate.
Note - you only need to select the stock card category and define the VAT rate during the initial semi-product manufacturing.
8. Confirm the manufacture by clicking the Manufacture button.
Manufacture
Manufacture serve as an optional feature when creating semi-products. It serves as a tab where all manufactured semi-products are stored.
Note – if you'd like to learn how to create a semi-product, its recipe, and how to manufacture it, read more in this article under the Semi-products topic
To manage choose the Stock (1) section on the top bar of the page. You'll see the menu with Manufacture (3) on the left side.
The all manufactured semi-products can be found in the Manufacture subsection. You can use the calendar to display only manufactured semi-products that took place within a specific time frame, and sort manufacture by the Author or using search option.
Important – don't forget to select a specific Stock.
All production records can also be exported in .csv format.
1. Select the Manufacture subsection.
Important – don't forget to select a specific Stock.
2. Find the manufactured item you want to edit.
3. In the Action column on the right side, click the pencil button.
4. This will open a new window. Here you can edit semi-product manufacture.
5. After making the changes, click the Edit button.
Important - the manufacture records can be edit maximum of 45 days back.
1. Select the Manufacture subsection.
Important – don't forget to select a specific Stock.
2. Find the manufactured item you want to delete.
3. In the Action column on the right side, click the bin icon.
4. Confirm the action by clicking the OK button.
Important - the manufacture records can be delete maximum of 45 days back.
Suppliers overview
The Suppliers overview displays all vendors you regularly work with and use for your inventory. This section gives you insight into the list of suppliers you buy goods from, the total value of stock-ups, the number of stock-ups, as well as the date of the last stock up.
In the Action column you can click on the information icon and find out more details about a particular vendor, e.g. which goods have been purchased and at what price.
This provides your business valuable insights, such as:
How much money you spent at a particular supplier.
Which supplier provides the best price (based on your stock-up history and price).
What raw materials you buy from a specific supplier.
What the total value is with a particular supplier.