We're creating resources and articles to answer your questions and help you get the most out of your Teya products and services.
Other features
payapp settings
manage features in app settings
enable pay by link
enable tips
change manager pin
transaction history pin
Updated
3 months ago
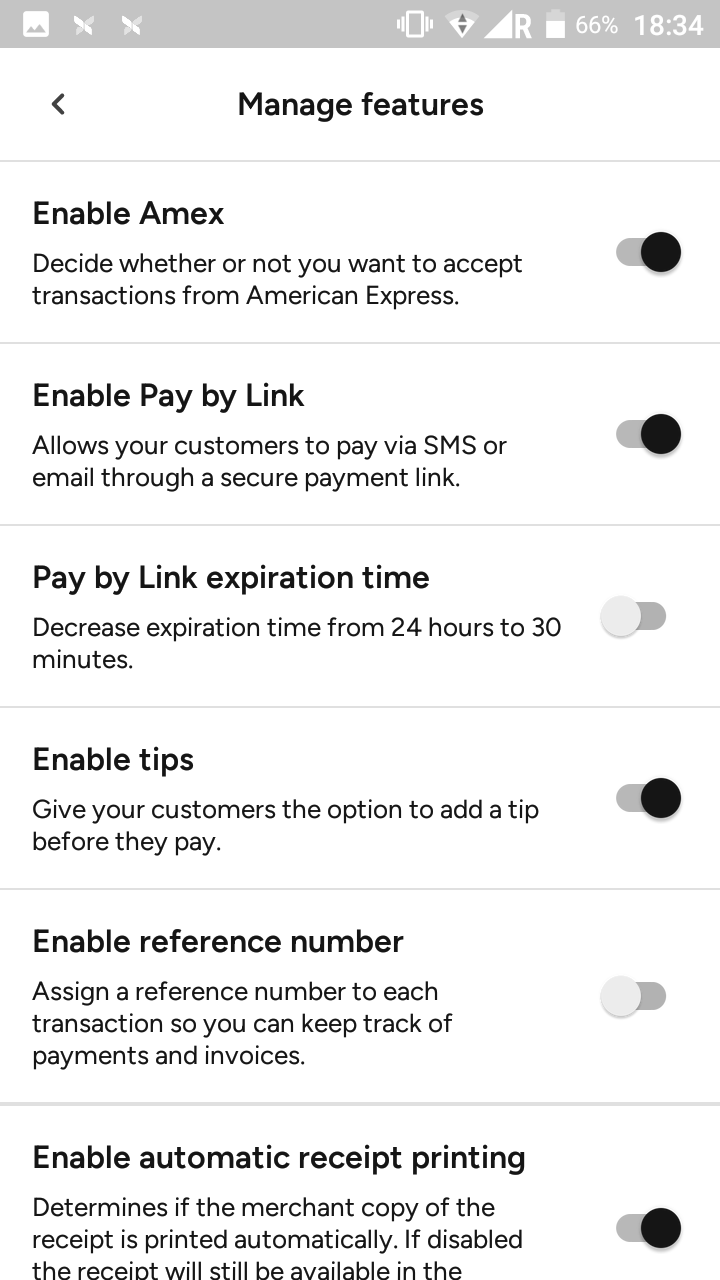
The payment app on your card machine offers a lot of additional features that you can benefit from. To access them, go to the app's ≡ Menu in the top left corner, and select Manage features.
Note: to access this part of the app, you'll be required to enter the manager PIN.
The manage features section contains a list of features available on your payment app. You can enable the ones that suit your business.
Tips
By enabling this feature, your customers will be able to leave a tip while completing their card payment on the terminal. Read more about it in the article Tips.
Amex
Amex is enabled on your card terminal by default. You can of course choose to opt out by disabling the Amex toggle. To do so, please go to Manage features > Amex, and disable the toggle. Once disabled, the button will turn grey.
Note: if you've been a Teya user prior to May 2023, you will have to manually enable the Amex toggle in Manage features > Amex.
Important: you will only be able to use the Pay by Link feature if Amex is enabled. If Amex is disabled, the Pay by Link will be disabled as well.
Pay by Link
A Pay by Link feature allows your customers to pay remotely, via SMS or email,through a secure payment link.
Important: you will only be able to use the Pay by Link feature if Amex is enabled in Manage features > Amex. If Amex is disabled, the Pay by Link will be disabled as well.
If this feature is enabled, it'll be visible to you on your device when your customers are paying. Instead of choosing a card, choose the Pay by Link and follow the steps on the screen. Your customer will receive the payment link on their mobile or email, click on the link, and enter their card details. The transactions will be visible in the section transactions.
The Pay by Link feature is automatically set to expire after 24 hours. You can shorten it by enabling the 30-minute expiration, which then automatically disables original expiration. Read more about it in the article Pay by Link.
Dynamic Currency Conversion (DCC)
The Dynamic Currency Conversion (DCC) is automatically enabled on your card terminal. This feature allows your international customers to pay in their home currency, ensuring they're aware of the value they're paying when traveling abroad. This feature improves their experience and it does not affect your business in any way. You will still get settled in the usual way and summaries will show in your business’s currency.
By enabling this option, your customers will be able to sign up for your Teya Rewards programme. Every time a transaction is approved, a QR code will be displayed. Once your customers scan it, they will be taken to the app store to download the Teya Rewards app. They can then earn loyalty points every time they use their card to pay.
Allows you to assign reference numbers to each transaction to help you pair payments with invoices.
Lock screen
Enable this feature if you'd like your card machine screen to lock whenever it's not in use.
Automatic receipt printing
If disabled, your business copy of the receipt won't be printed automatically after each transaction. It'll still be available in transactions and refunds. Also, after each transaction, you'll be able to press Print customer receipt or Print merchant receipt in case you decide to print a copy.
Auto start
The app starts automatically when the terminal boots up.
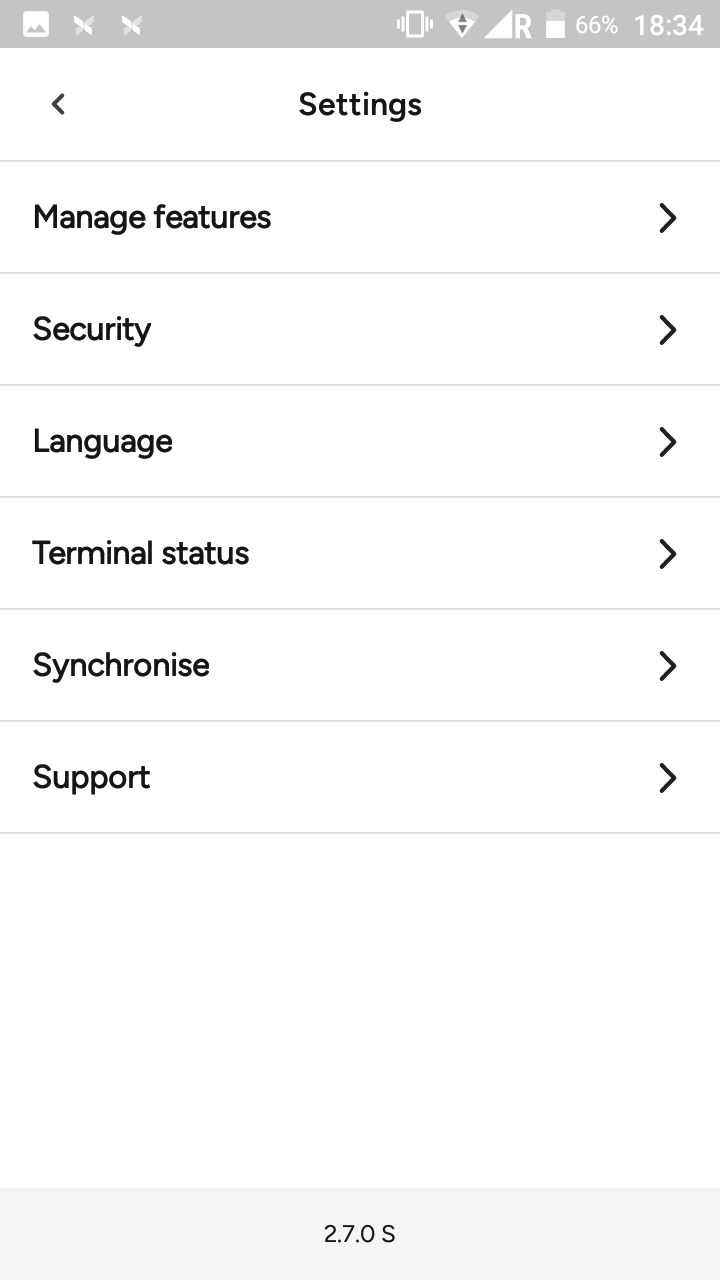
You can easily check the app version on your device by clicking on the Settings or Menu icon in the top left screen. This will open a window with the menu. At the bottom of the screen, you'll notice the app version, e.g. 2.7.0.
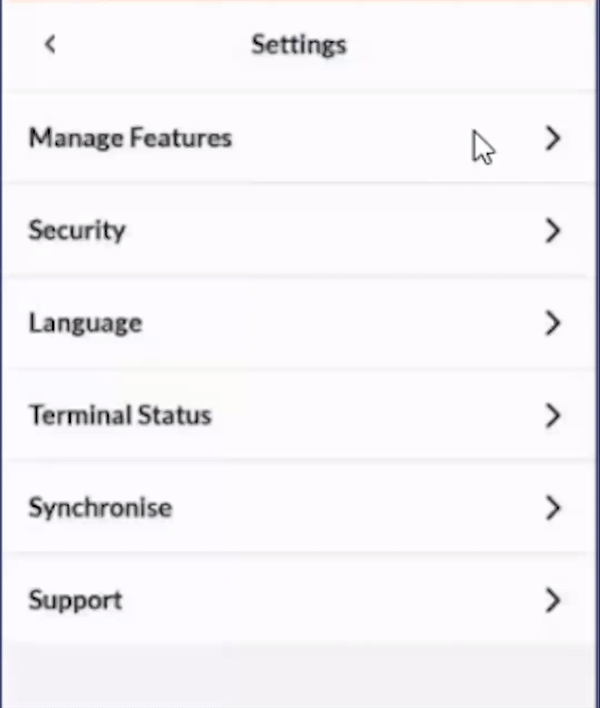
The payment app on your card machine offers a lot of additional features that you can benefit from. To access them, go to the ⚙️ Settings icon in the top left corner of your payment app's main menu.
This will open a new window and you'll be able to choose from the list and learn more about:
Manage features in the app on your device.
Security of the app on your device.
Preferred language of the app on your device.
Terminal status for more technical information regarding your app and your device.
Synchronise for updating the app on your device.
Support for phone and email contacts of our support team.
In the article below, we'll provide more detail about manage features and security.
Manage features
This is the place for managing your app's features. Read on for more.
Enable Pay by Link
A Pay by Link feature allows your customers to pay remotely, via SMS or email,through a secure payment link. If this feature is enabled in ⚙️ Settings, it'll be visible to you on your device when your customers are paying.
Instead of choosing a card, choose the Pay by Link and follow the steps on the screen. Your customer will receive the payment link on their mobile or email, click on the link, and enter their card details. The transactions will be visible in the section transactions.
Note:the payment link will expire after 24 hours by default. You can adjust the expiration time to 30 minutes by enabling Shorten expiration time. Go into Settings > Manage features > Shorten expiration time.
Important: to use the Pay by Link feature in the UK, you're required to enable Amex on your terminal.
If you're an existing user of Pay by Link, please go to ⚙️ Settings > Manage features > Enable Amex, then go to ⚙️ Settings > Manage features and re-enable Pay by Link.
If you're a new user of Pay by Link, please go to ⚙️ Settings > Manage features > Enable Amex, then go to⚙️ Settings > Manage features > Enable Pay by Link.
Enable Amex
You're now able to accept Amex cards on our card machines in the UK. To enable it on your terminal, please do the following:
1. From your payment app main menu, click on the ⚙️ Settings icon in the top left corner.
2. Choose the Manage Features option.
3. Select Enable Amex. Once selected, the toggle will turn black.
If you don't want to accept Amex, just leave the toggle turned off (grey). You can always enable this option on your terminal at a later time.
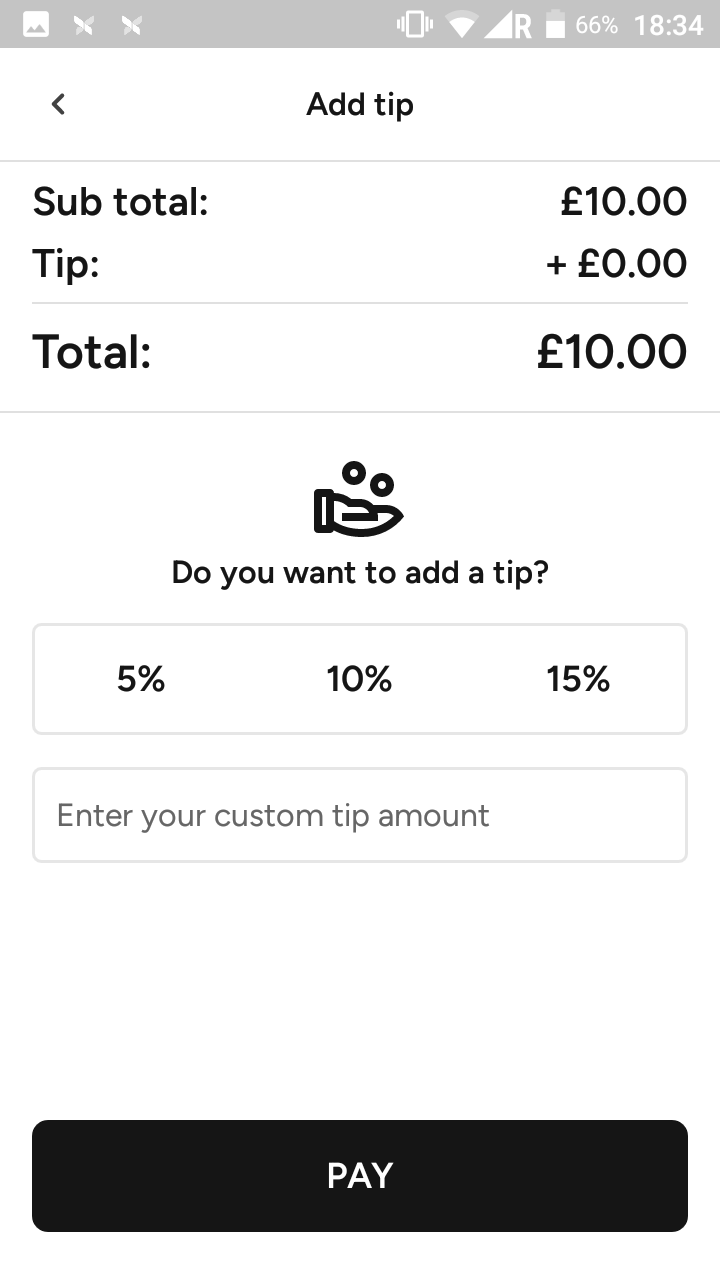
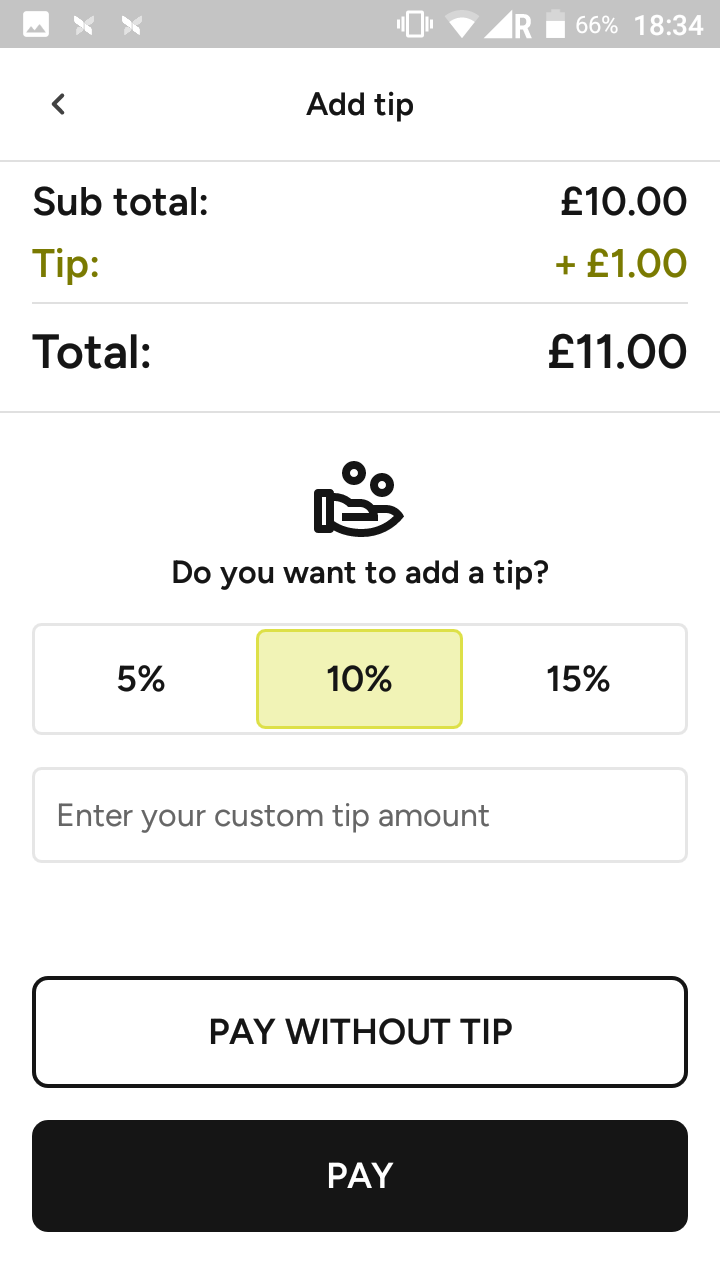
Enable tips
You can now accept tips by card. To do this, just enable tips in the manage features section.
From your payment app main menu, click on the Settings icon in the top left corner.
Choose the Manage features option.
Select Enable tips. Once selected, the toggle will turn black.
During every card payment, your customers will be presented with the option of leaving a tip. They can choose between 5%, 10%, 15% tip, or insert a custom amount of their preference. If in the middle of the process they change their mind and choose not to leave a tip, they should just press Pay without tip.
If your customer does not wish to leave a tip at all while paying, they can simply skip this step and press Pay. The app will continue with the payment without adding a tip.
Other useful features in Manage features
Enable reference number
Allows you to assign reference numbers to each transaction to help you pair payments with invoices.
Enable automatic receipt printing
If disabled, your business copy of the receipt won't be printed automatically after each transaction. It will still be available in the transaction history.
Enable auto start
The app starts automatically when the terminal boots up.
Enable ePOS on terminal
This option is available if you're using the cash register system integrated with the card payment app. Allows another app on the terminal to start a transaction.
Enable Pay at Counter mode
External ePOS hardware can send a transaction from the ePOS to the terminal if they're integrated. This refers to a cash register you have in your shop/venue that is connected to the card machine. Manager PIN is required to deactivate this setting.
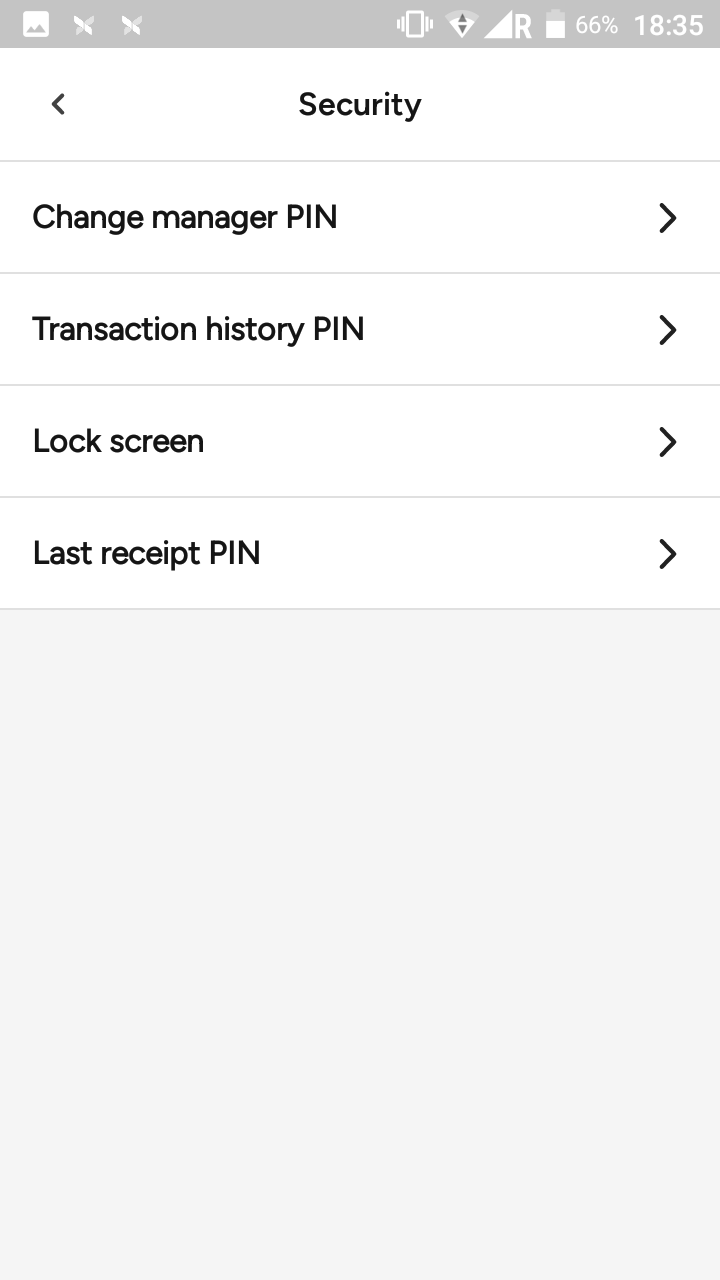
Security
In the security section, you can manage all details regarding the security of your device and the payment app you use on it. You can choose to make some parts of the app available only to your most trusted employees.
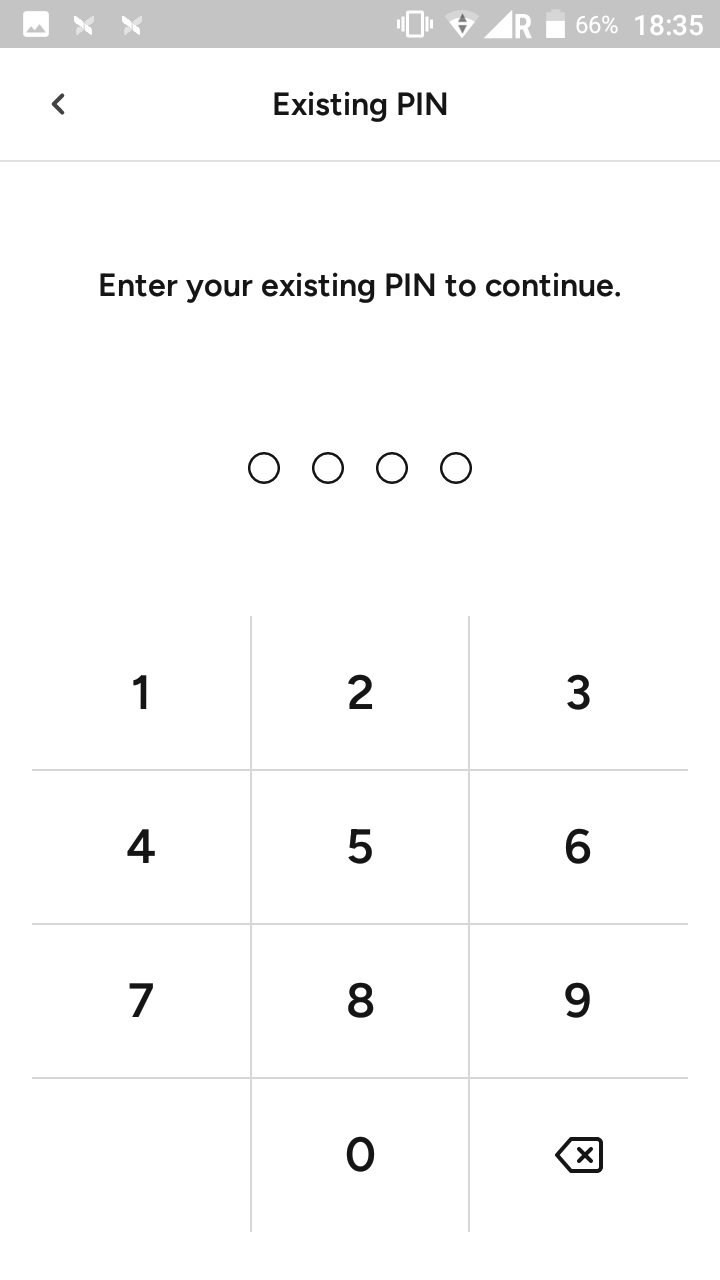
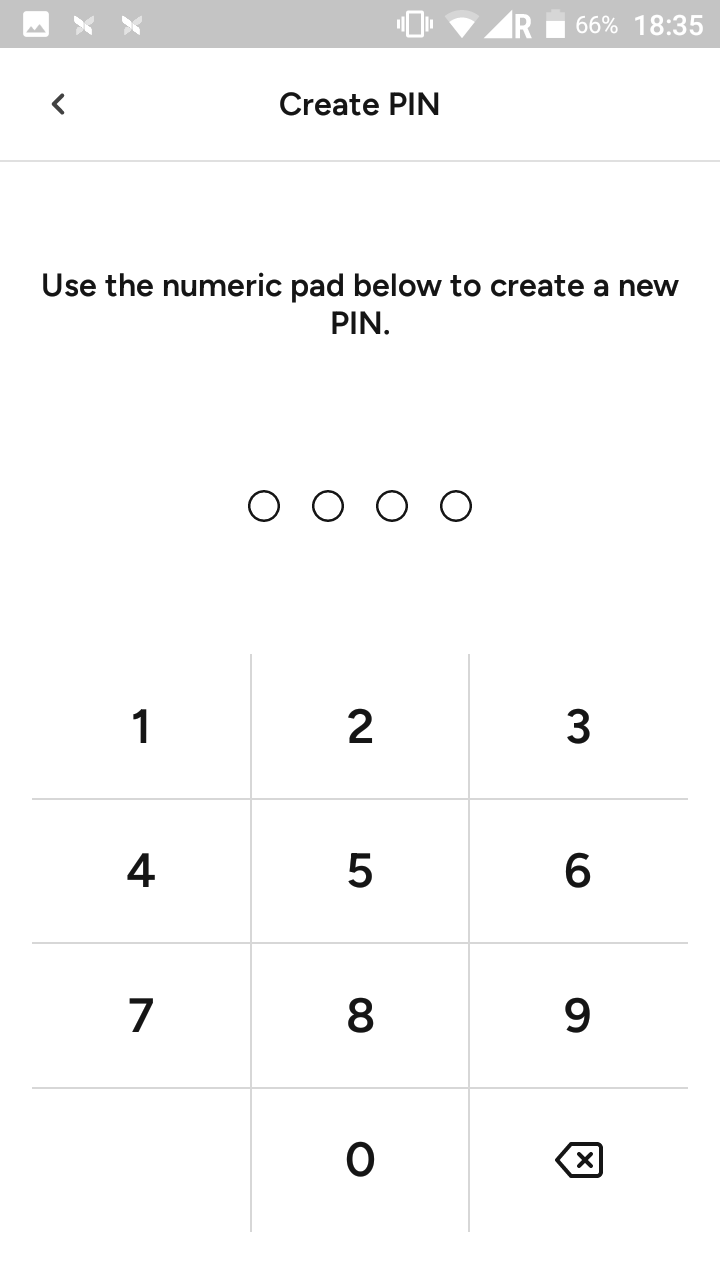
Change manager PIN
Whenever you want to cancel a transaction or process a refund, you'll be asked to enter your four-digit security PIN.
Your terminal will either have this PIN already preloaded, or you'll set it up the first time you launch the app. Either way, you can change it at any time by following the steps below:
From your payment app main menu, click on the Settings icon in the top left corner.
Choose the Security option.
Enter your four-digit PIN to continue.
Press Change manager PIN.
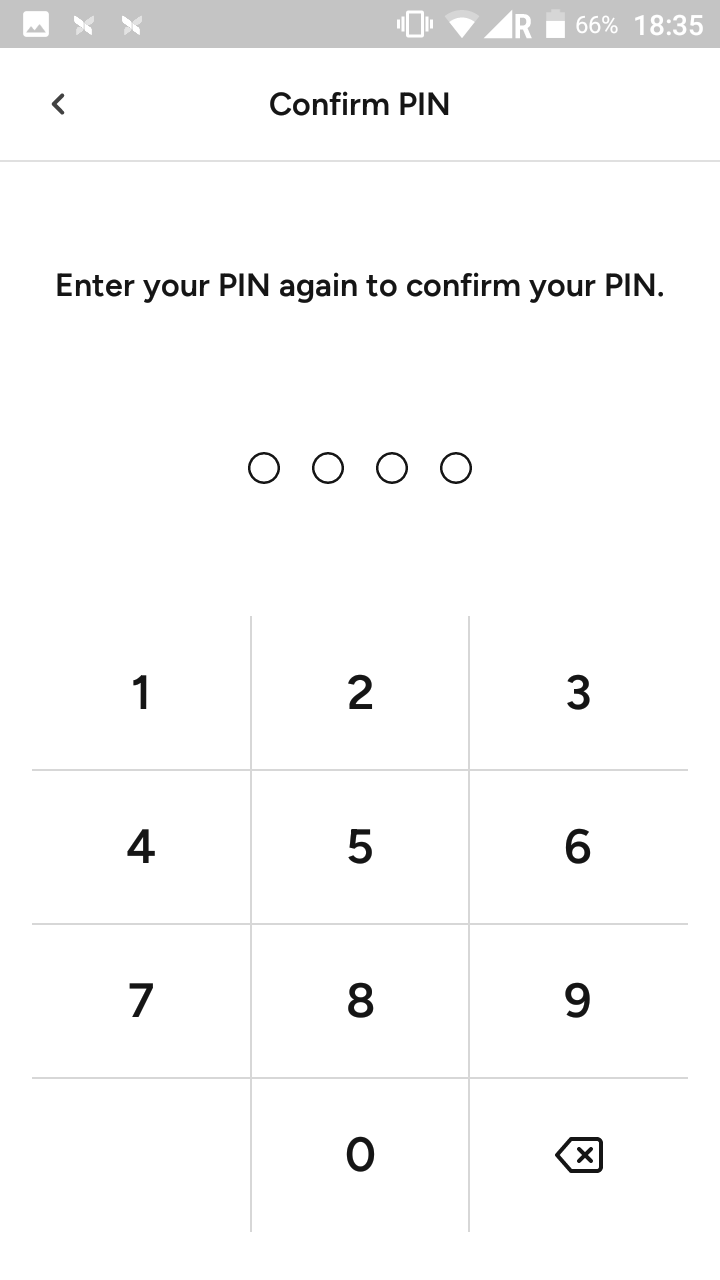
Enter your current PIN.
Create a new PIN.
Confirm this change by entering your new PIN once more.
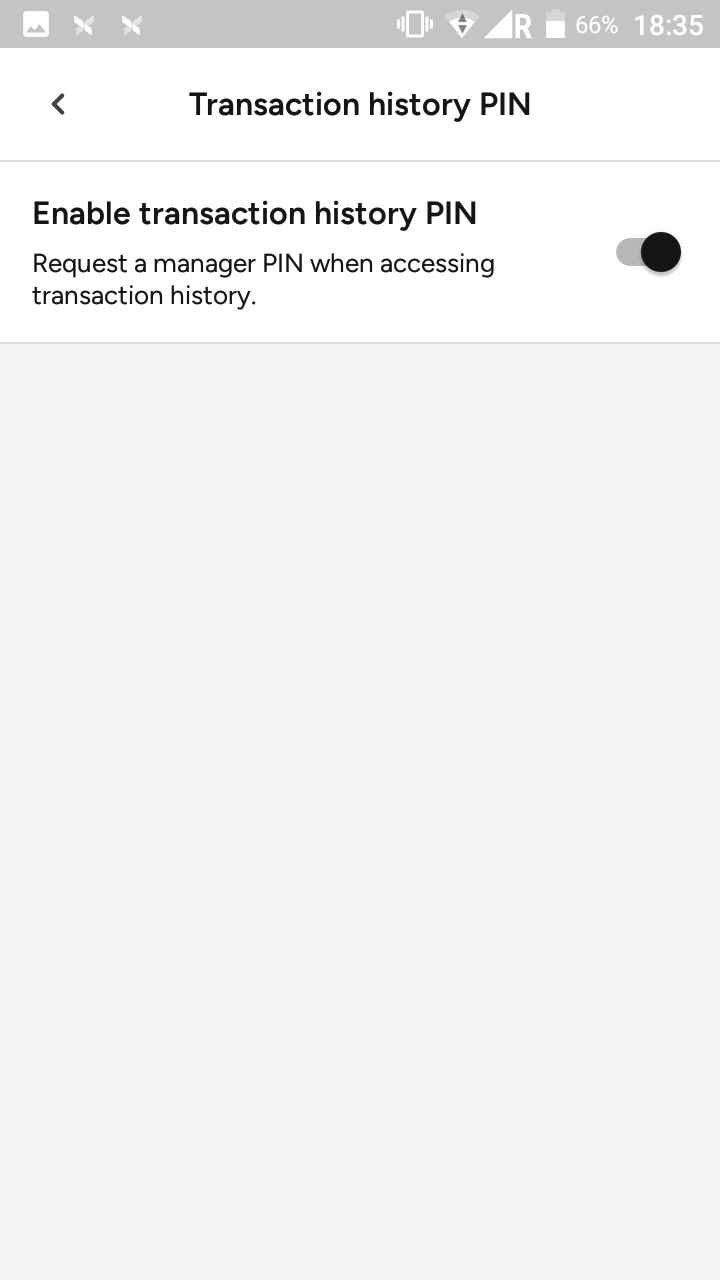
Transaction history PIN
You can also protect access to your transaction history by enabling Transaction history PIN control.
From your payment app main menu, click on the Settings icon in the top left corner.
Choose the Security option and enter your four-digit PIN.
Select Transaction history PIN.
Tap the toggle switch next to Enable transaction history PIN control. When enabled, the toggle switch is black.
You'll be required to input the PIN each time you access your transaction history.
In the Security section, you can also choose to:
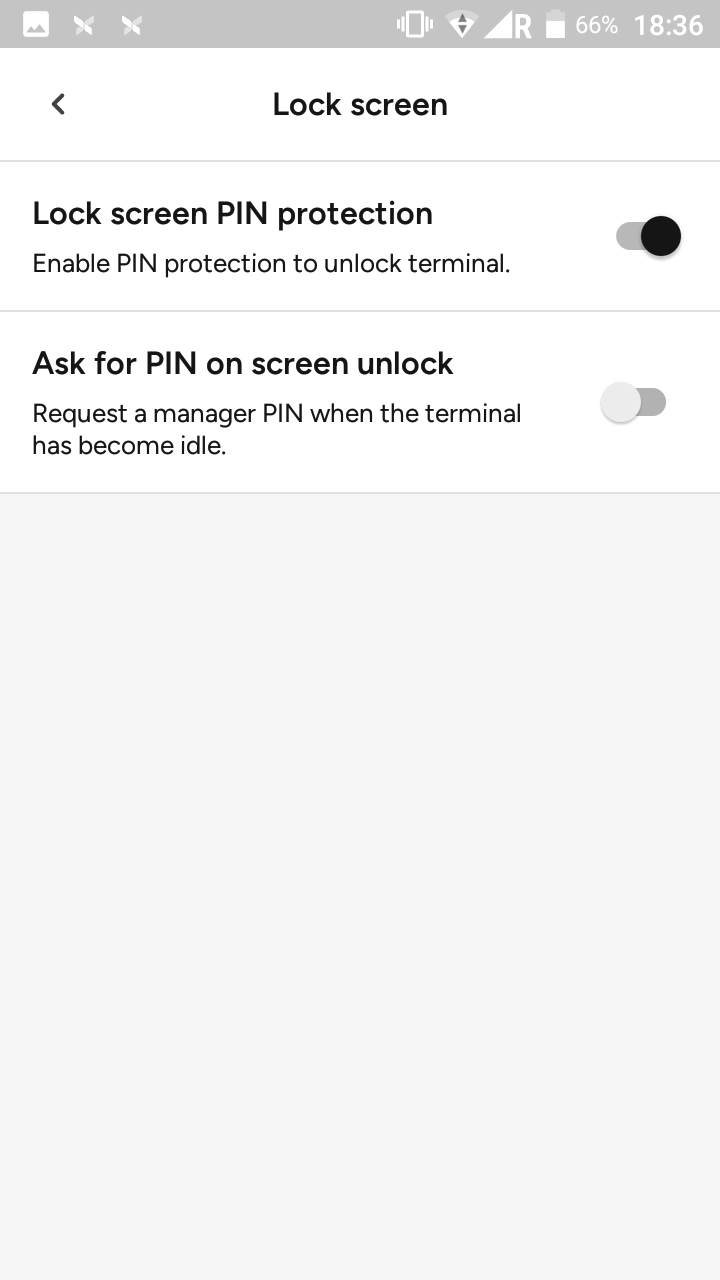
Lock screen. Go to Settings > Security > Lock screen > Enable lock screen. You can then also enable a lock screen PIN protection.
Last receipt PIN. Go to Settings > Security > Last receipt PIN > Enable last receipt PIN control.